www.designfreebies.org
See you there!
This tutorial is for people who are new with Photoshop or for people who have been using Photoshop but don’t know how to use Layer Masks.
The basics of Layer masks are incredibly simple but very powerful.
This is a quick and simple tutorial that will teach you how to use Layer Mask Basics. And the best way to learn is try to follow this tutorial on your own rather than just reading about it.First, let me explain what a layer mask is. What happens when someone wears a mask? Silly question, yes? It's obvious that everything behind the mask is not visible and everything else shows. That's basically how layer masks work. Simple? Yes it is, so let's follow a quick tutorial.
The final result will be this image below. It's a picture of my son Jian superimposed in front of Eiffel Tower. After this tutorial, you can now choose any famous landmark, layer mask your photo and show it to your friends. Cool huh?

Step 1: Find two images that you want to combine. Here are the images I used:
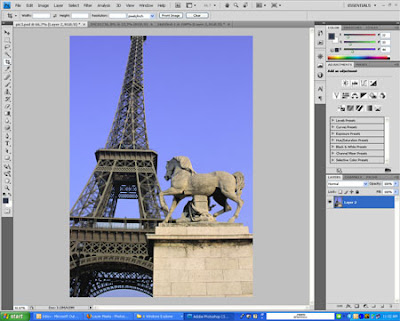
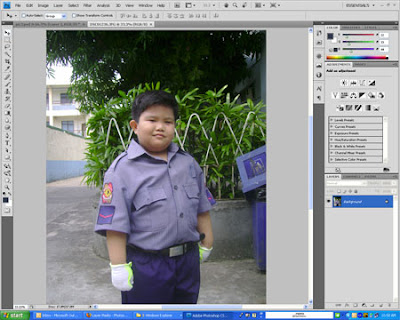
Step 2: Open both the images in Photoshop. Click on the boy's image, then choose the Marquee (selection) Tool. Drag it over to the image to select the area you want to paste on the other (Eiffel) image. Copy and paste on the Eiffel image. After pasting it on, you can resize the boy's photo proportionately or you can leave it the way it is. Your choice.
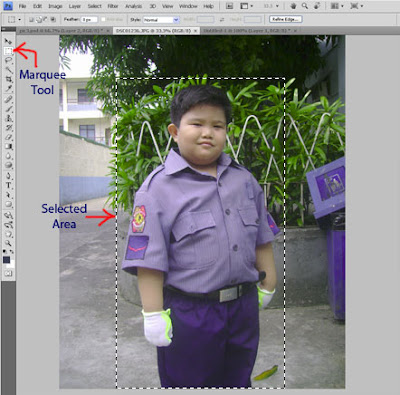
Jian's image selected
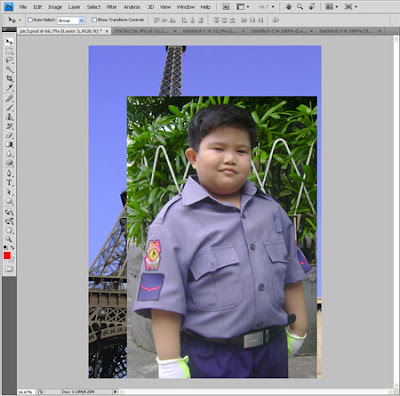
Jian's image pasted
Step 3: Choose the layer with the boy and then click on the Layer Mask button. It’s the rectangle with the circle in it.
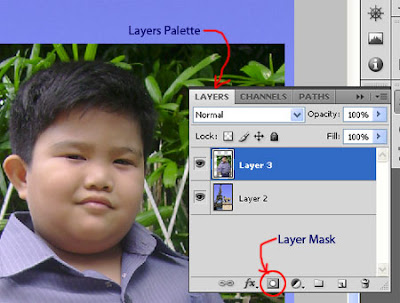
The Layer Mask palette
The layer mask, currently it is set to reveal all of the image, meaning that the mask is off and nothing is hidden.
Now we actually use the mask. While the boy's layer is selected, click on the layer mask button. You’ll also notice that when you click on the layer mask your colors in the color picker turn to black and white. So here it is… the secret of Layer masks: Depending on what the settings are, the color WHITE shows or reveals the image AND the color BLACK hides or masks the image (We’re talking about the image on which the layer mask is applied, not the layer below it). So on to step 4.
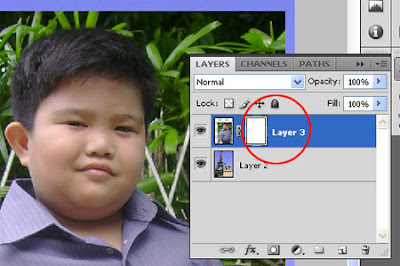
Layer Mask added
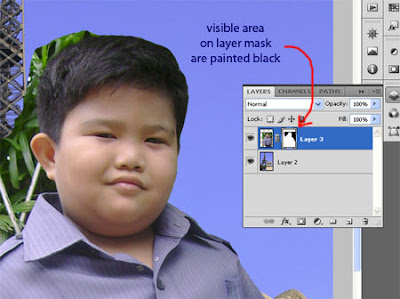
Step 4: Grab your PAINTBRUSH. Choose BLACK and start wildly painting. Paint over the background of the boy's image. Paint over the background as accurate as you can. Keep on painting until all backgrounds are masked. Now if you make a mistake and hidden part of the boy's image? No problem. Layer masks are not destructive so just change the color to WHITE and paint over the area you want to appear and it’ll magically reappear. You can basically adjust the brush size, or the shade of gray and you get way more control than using destructive methods. If you use an eraser you can’t easily undo something you did 20 steps before etc etc.
Good thing about layer masks is that you need not worry about being perfect because nothing is being deleted. It’s all there. Just hit the “X” key on your keyboard and you’ll quickly switch between black and white and you can fix your mistakes. Now after you have quickly erased everything that is not needed just zoom away and with a small brush just fix up the edges so they look good.
That's it. In four easy steps, you'll have the final image above.
I hope I was able to show you how layer masks can make your life easier. This is obviously not the only thing you can do with layer masks so keep playing with this and learn more. If you have any questions then leave me comments below and I’ll try my best to get back to you in a timely fashion.


No comments:
Post a Comment